
Overview
With Tanzu Kubernetes Grid, you can deploy Kubernetes clusters across software-defined datacenters (SDDC) and public cloud environments, including vSphere, Microsoft Azure, and Amazon EC2, providing organizations a consistent, upstream-compatible, regional Kubernetes substrate that is ready for end-user workloads and ecosystem integrations.
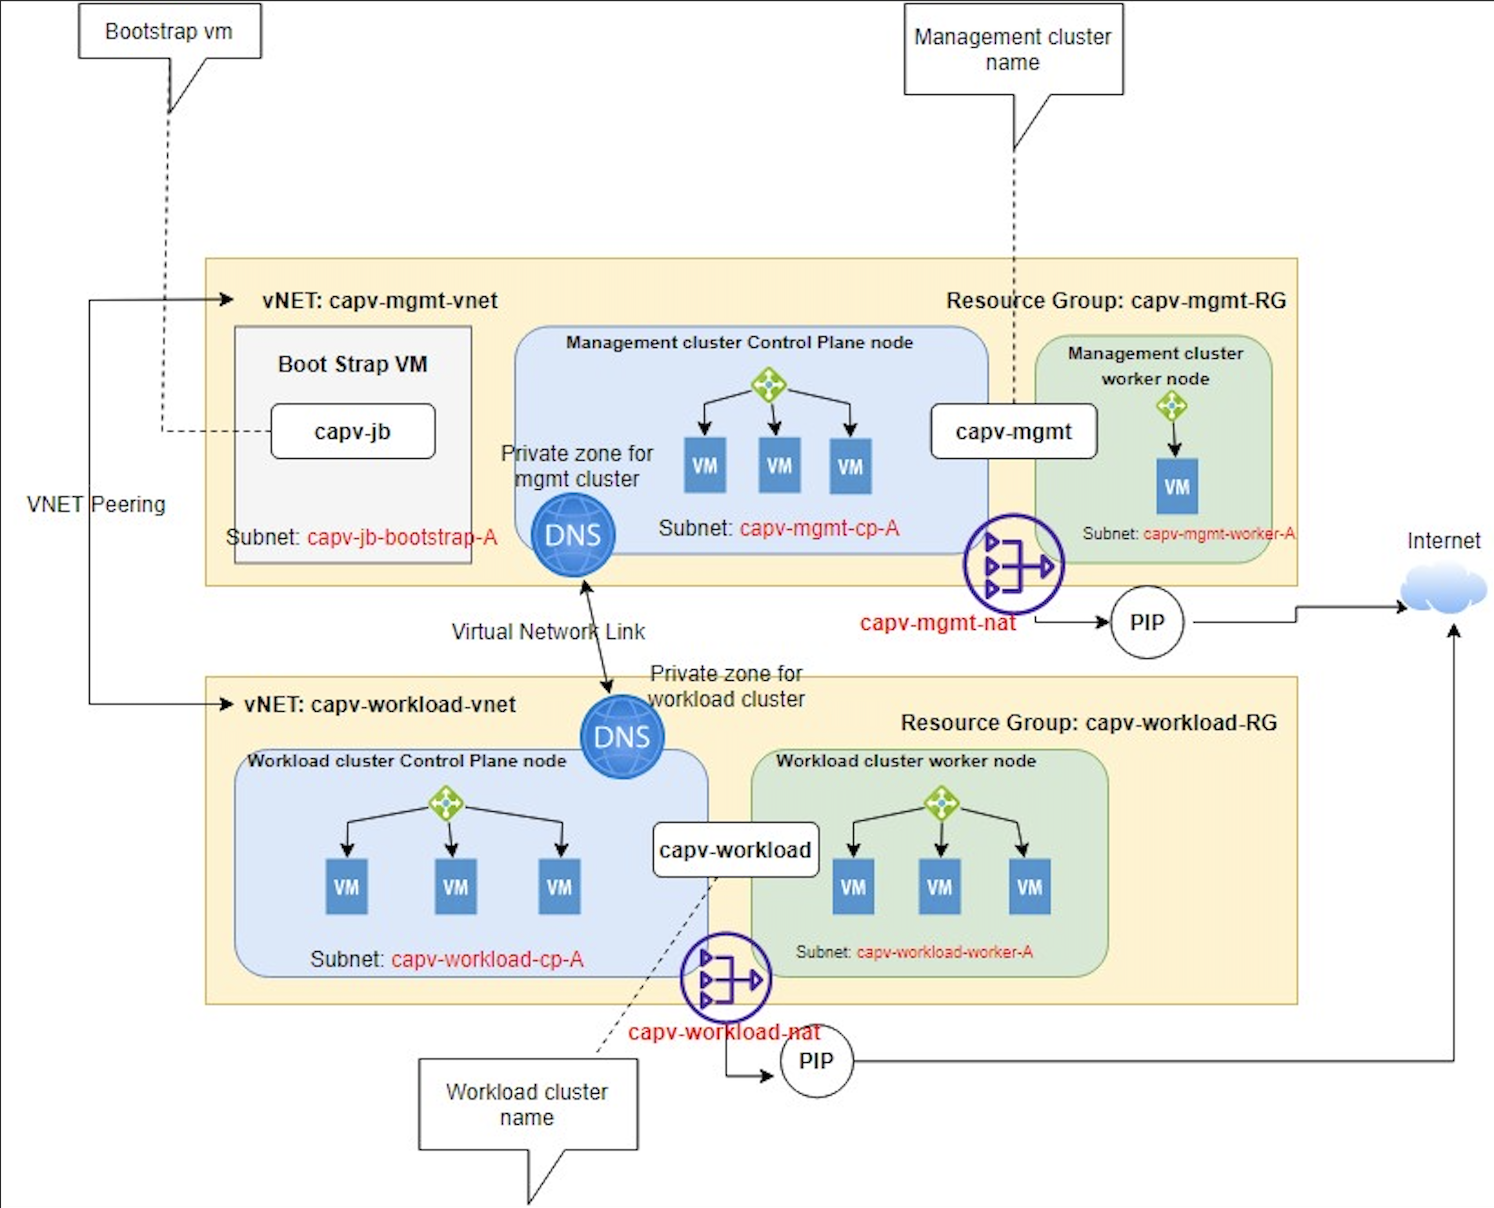
In this post, I will explain the detailed steps to deploy TKG cluster on Azure (version: 1.5.2) by using separate VNETs for Management and workload clusters with NAT Gateway. I have tried to put together the components used in this demo as a simple architecture and I hope this helps you to understand how each of them talk to each other.
Prepare the setup
Create VNET, subnets and NAT gateway for management cluster
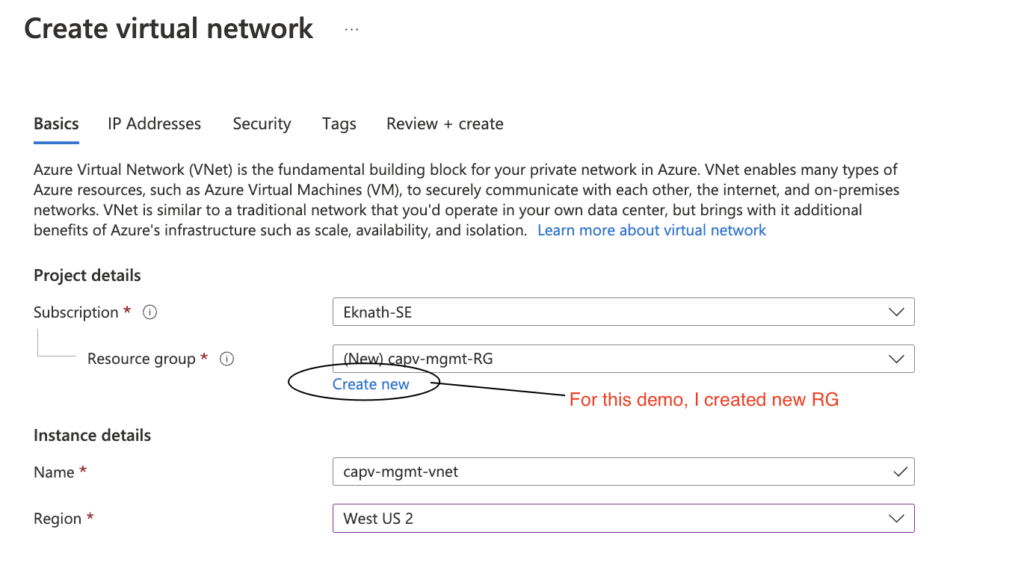
- Login to Azure portal > Virtual networks > Create
Note: create new resource group or select an existing one, It is recommended to isolate the resources, so I choose to create new resource group(capv-mgmt-RG).
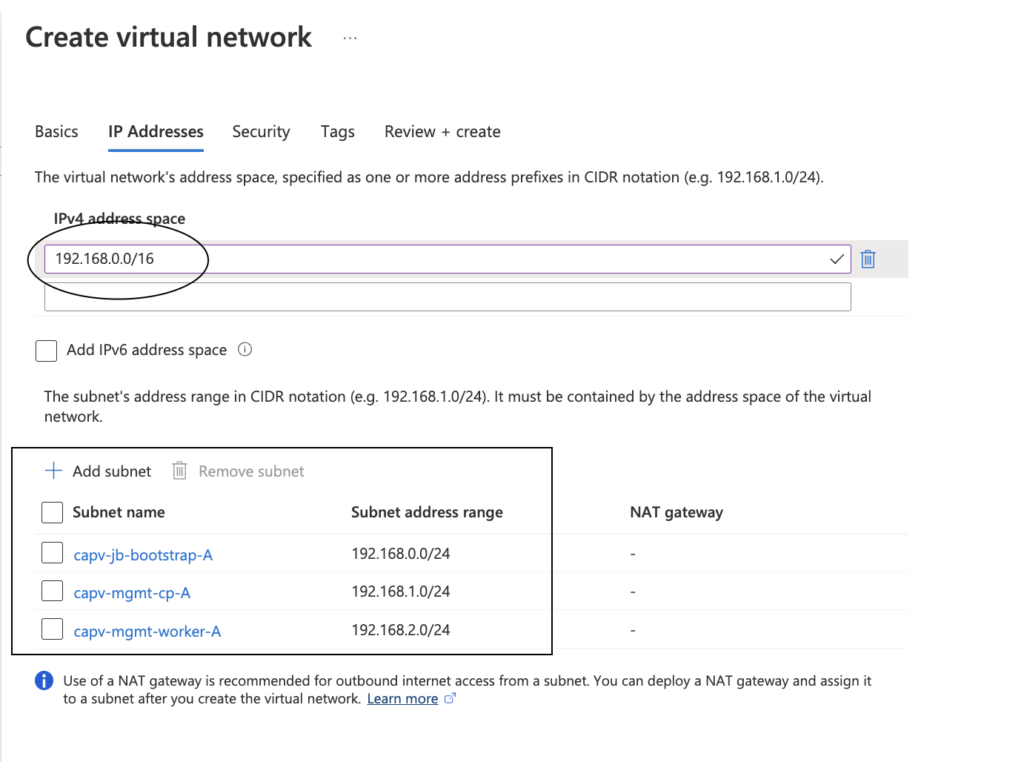
- Click on Next: Ip Addresses
- Provide IPv4 address space as shown below, followed by create subnets with min /28 CIDR for each
- Review + Create > Create
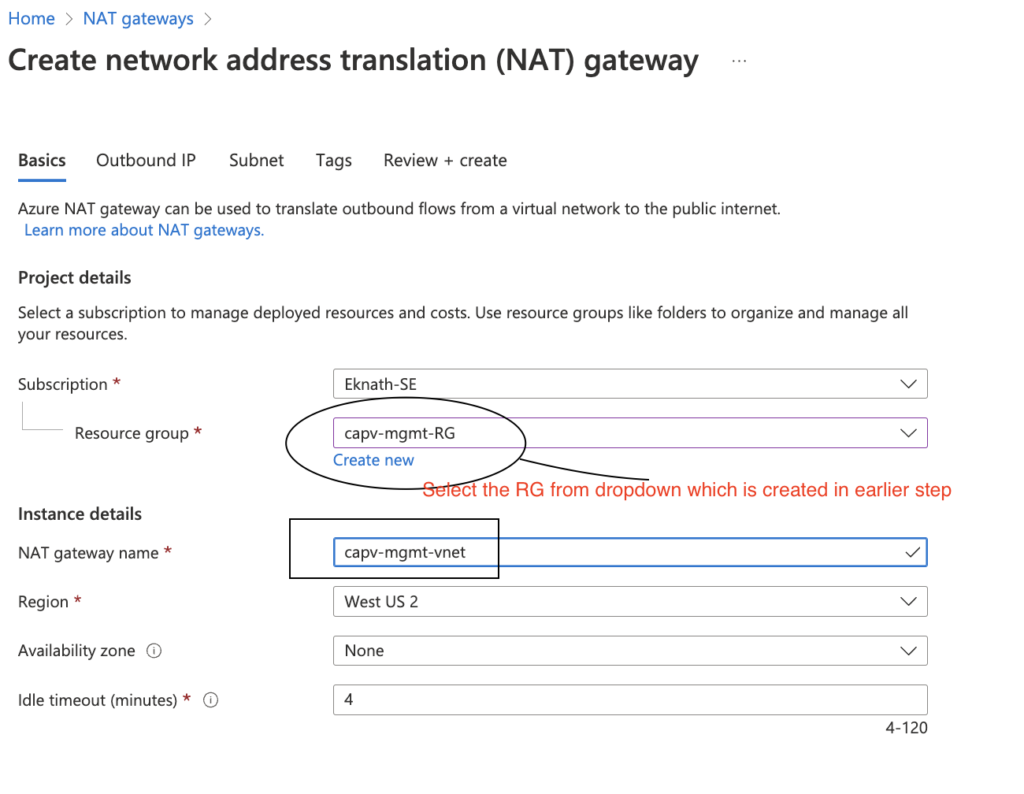
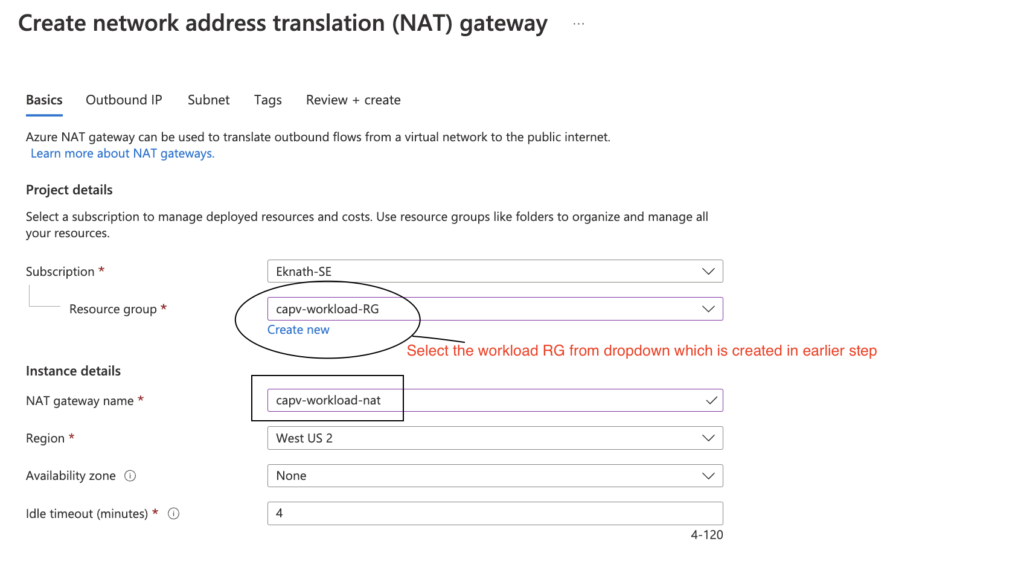
- In Azure portal, Navigate to NAT gateways > Create >
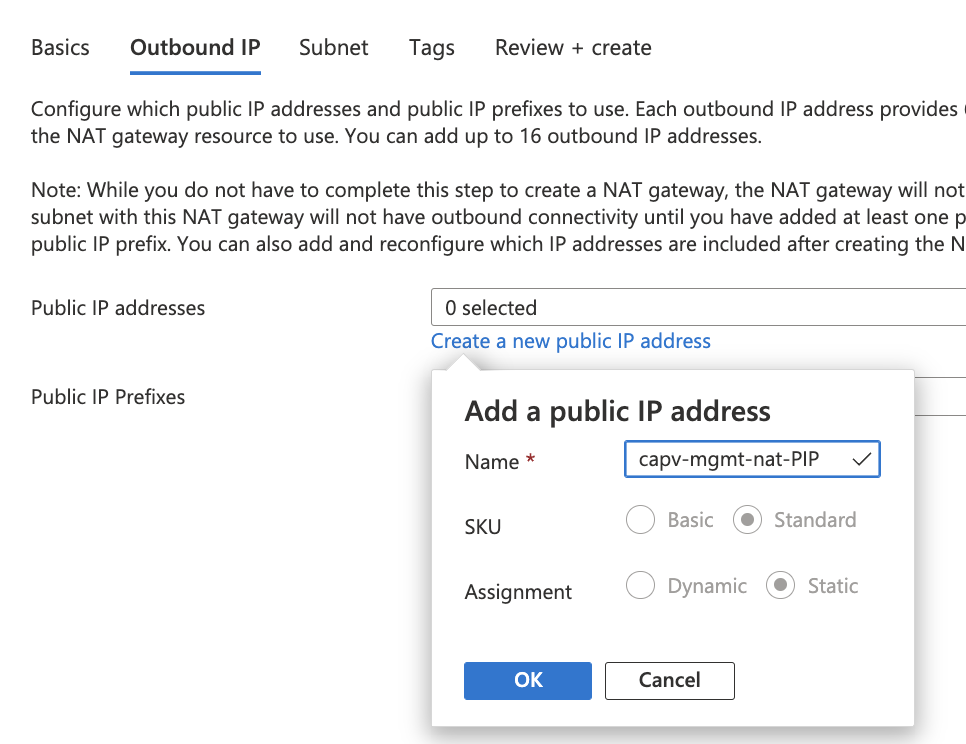
- Click on Next: Outbound IP
- create a new public IP address as below and click OK
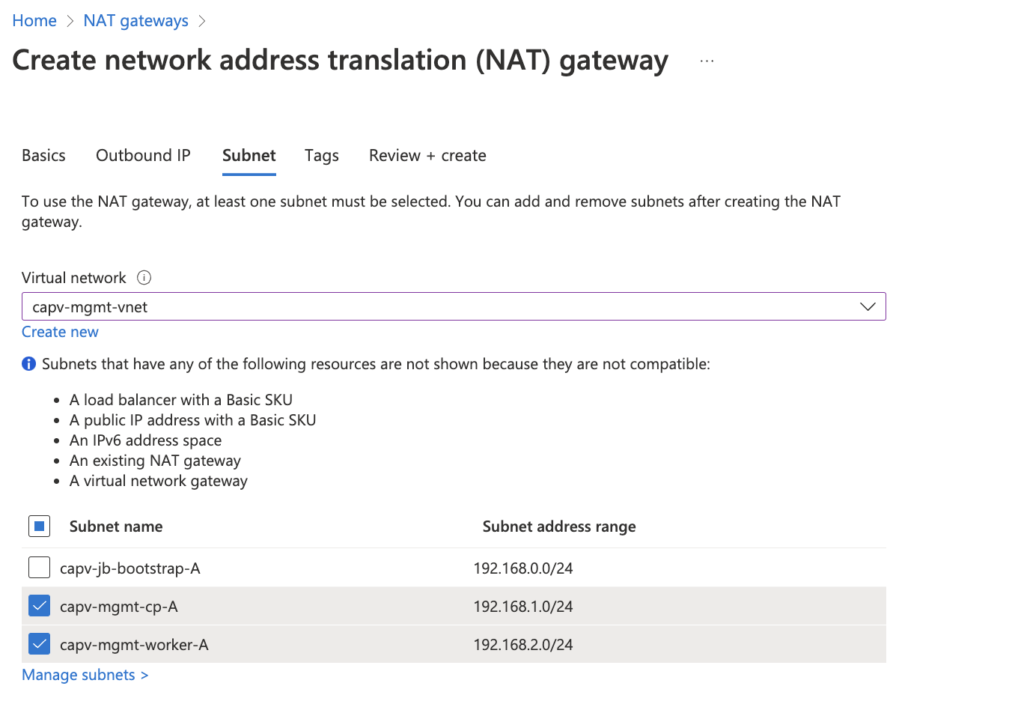
- Click on Next: Subnet
- select the management vnet from drop down and select subnets created earlier.
Note: I do not want to use NAT gateway for bootstrap vm, so left it unchecked.
- Review + Create > Create
Create Resource group, VNET, subnets and NAT gateway for workload cluster
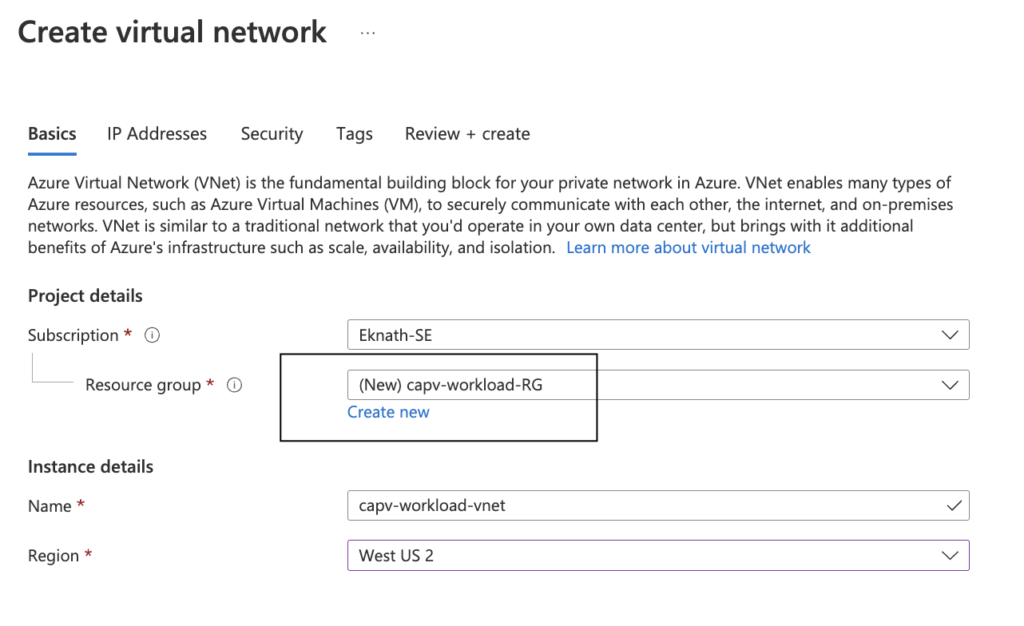
- Login to Azure portal > Virtual networks > Create
Note: create new resource group or select an existing one, It is recommended to isolate the resources, so I choose to create new resource group (capv-workload-RG)
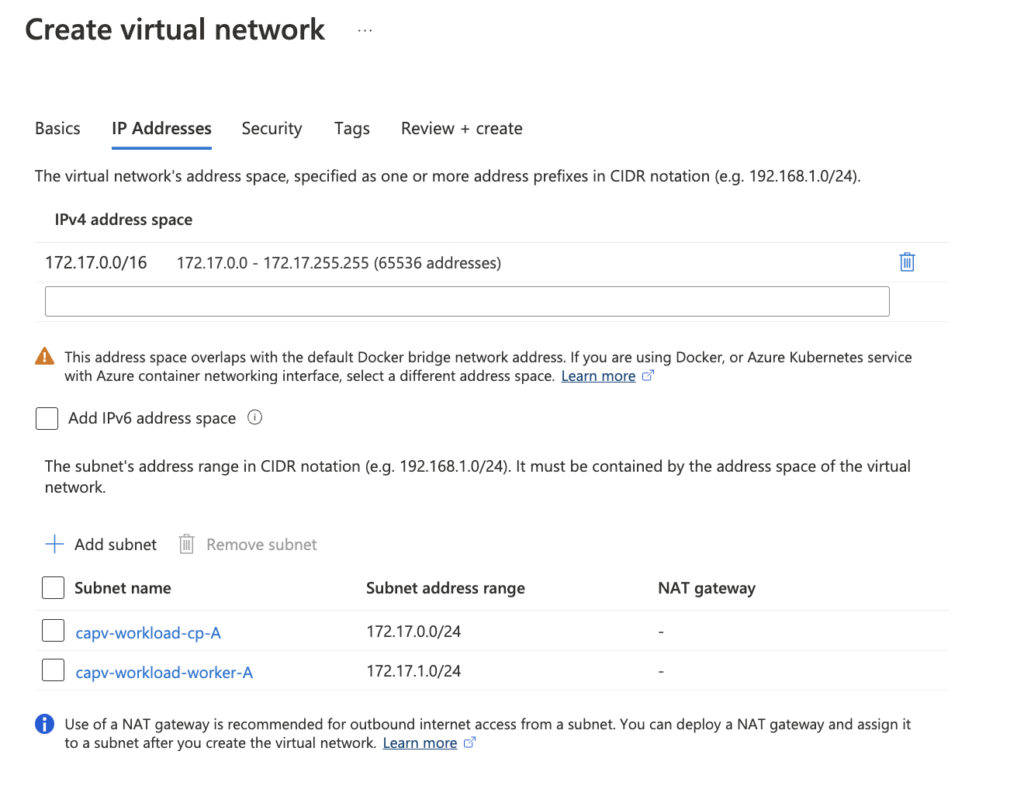
- Click on Next: Ip Addresses
- Provide IPv4 address space as shown below, followed by create subnets with min /28 CIDR for each
- Review + Create > Create
- In Azure portal, Navigate to NAT gateways > Create >
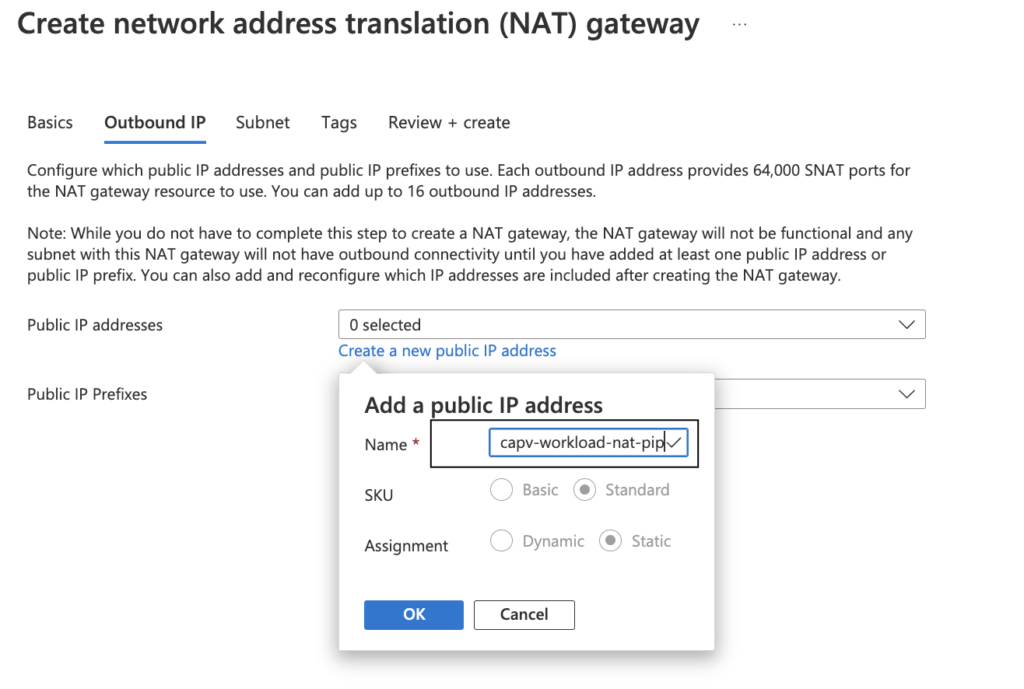
- Click on Next: Outbound IP
- create a new public IP address as below and click OK
- Click on Next: Subnet
- select the workload vnet from drop down and select subnets created earlier.

- Review + Create > Create
Configure VNET Peering
In Azure portal, Navigate to Virtual networks > management VNET (capv-mgmt-vnet) created earlier > Peerings > Add
- This virtual network:
- Peering link name: provide a name, In this case I have provided mgmtvnettoworkloadvnet
- Remote virtual network
- Peering link name: provide a name, In this case I have provided workloadvnettomgmtvnet
- Virtual network: Select workload cluster (capv-workload-vnet)
- Add
![]()
- In Azure portal, Navigate to Virtual networks > management VNET (capv-mgmt-vnet) created earlier > Peerings

- In Azure portal, Navigate to Virtual networks > workload VNET (capv-workload-vnet) created earlier > Peerings

Create NSG
Tanzu Kubernetes Grid management and workload clusters on Azure require two Network Security Groups (NSGs) to be defined on the cluster’s VNet and in its VNet resource group:
- An NSG named <CLUSTER-NAME>-controlplane-nsg and associated with the cluster’s control plane subnet. For this demo, two NSG’s are created:
-
-
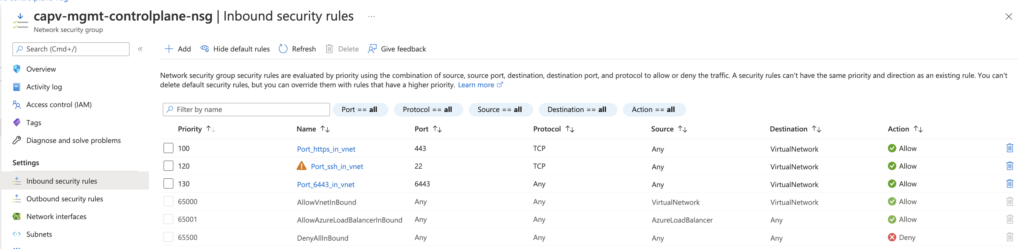
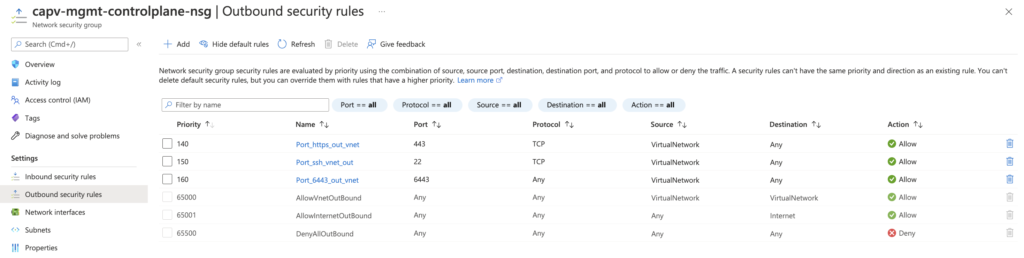
- capv-mgmt-controlplane-nsg: For management cluster control plane subnet
- capv-workload-controlplane-nsg: For Workload cluster control plane subnet
-
-
- An NSG named <CLUSTER-NAME>-node-nsg and associated with the cluster worker node subnet
-
-
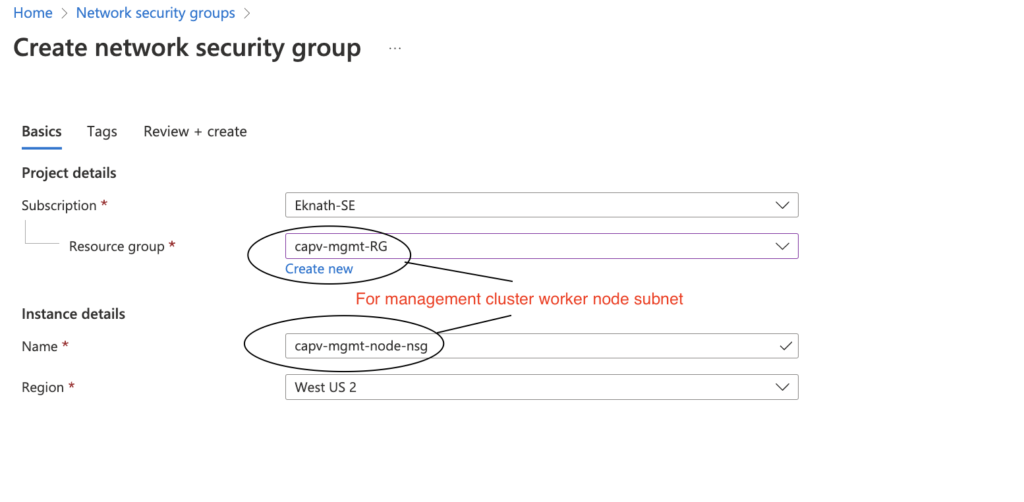
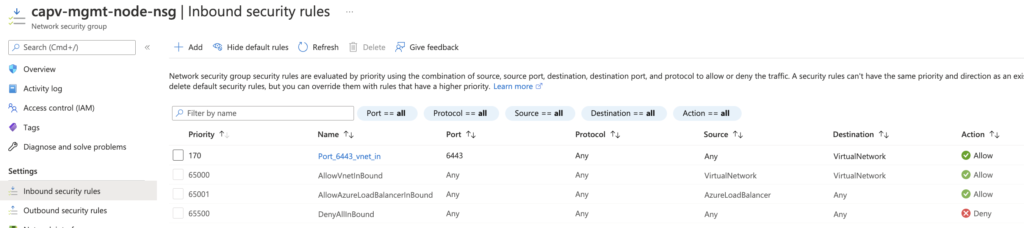
- capv-mgmt-node-nsg: For management cluster worker node subnet
- capv-workload-node-nsg: For workload cluster worker node subnet
-
-
NSG for management cluster control plane subnet
- In Azure portal, Navigate to Network Security Groups > Create
- Select management resource group (capv-mgmt-RG) from dropdown and name like: capv-mgmt-controlplane-nsg
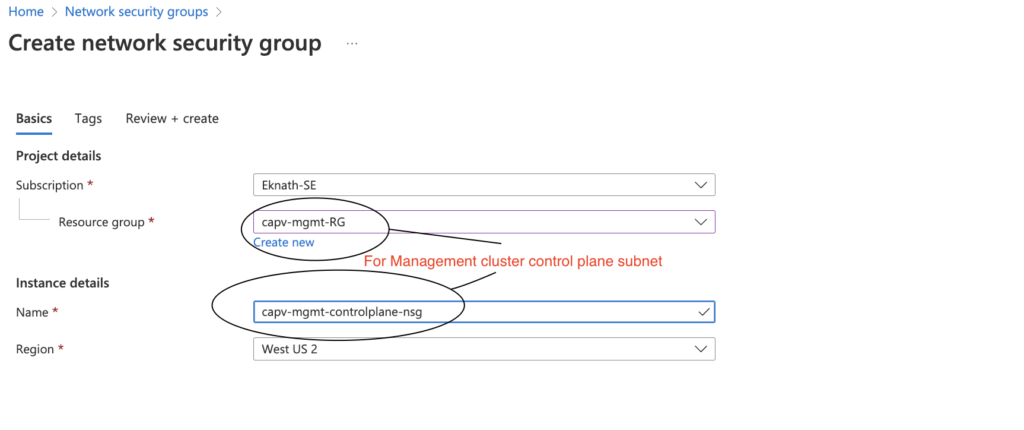
- Review + Create > Create
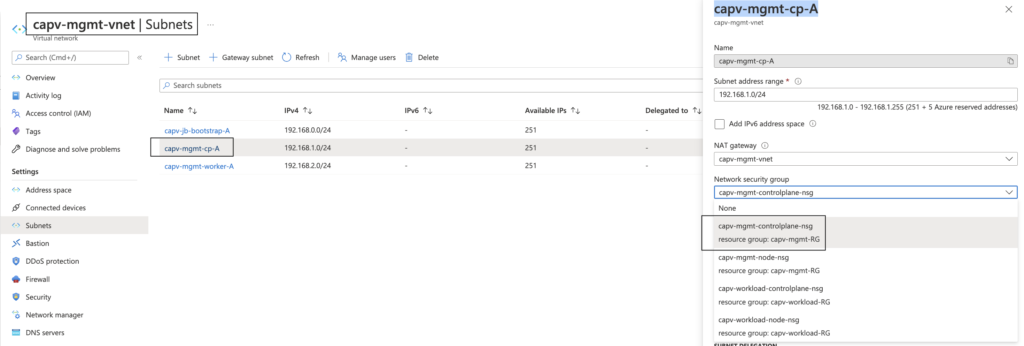
- In Azure portal, Navigate to Virtual Networks > management vnet (capv-mgmt-vnet) > Subnets > management cluster control plane subnet ( capv-mgmt-cp-A ) > Network security group > capv-mgmt-controlplane-nsg > Save
NSG for management cluster worker node subnet
- In Azure portal, Navigate to Network Security Groups > Create
- Select management resource group (capv-mgmt-RG) from dropdown and name like: capv-mgmt-node-nsg
- Review + Create > Create
- In Azure portal, Navigate to Virtual Networks > management vnet (capv-mgmt-vnet) > Subnets > management cluster workload subnet ( capv-mgmt-worker-A ) > Network security group > capv-mgmt-node-nsg > Save

NSG for Workload cluster control plane subnet
- In Azure portal, Navigate to Network Security Groups > Create
- Select management resource group (capv-workload-RG) from dropdown and name like: capv-workload-controlplane-nsg
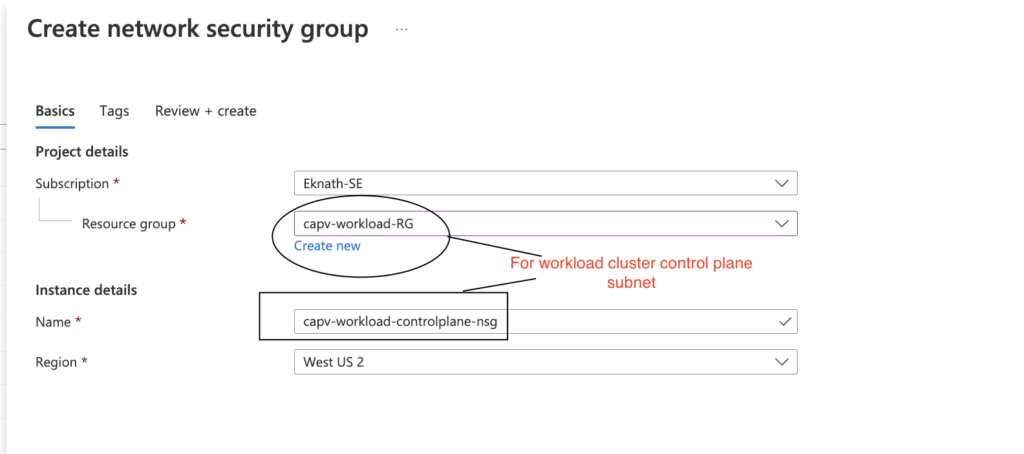
- Review + Create > Create
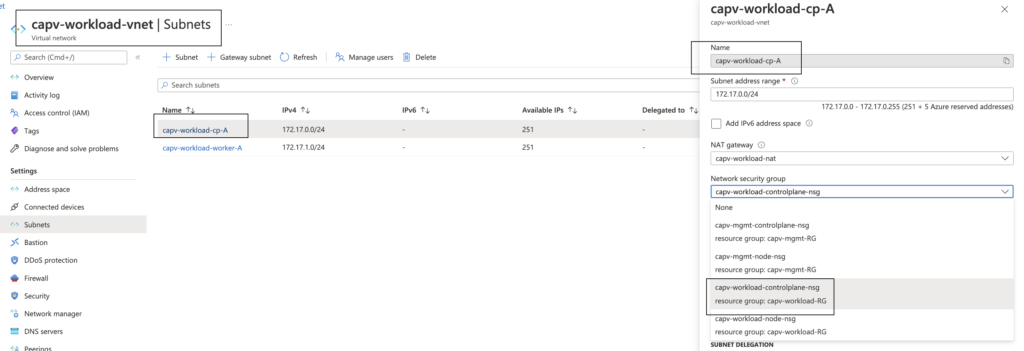
- In Azure portal, Navigate to Virtual Networks > workload vnet (capv-workload-vnet) > Subnets > workload cluster control plane subnet ( capv-workload-cp-A ) > Network security group > capv-workload-controlplane-nsg > Save
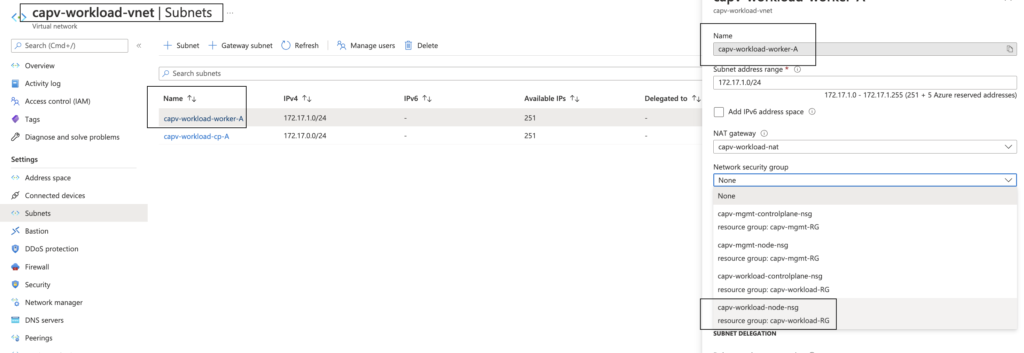
NSG for workload cluster worker node subnet
- In Azure portal, Navigate to Network Security Groups > Create
- Select management resource group (capv-workload-RG) from dropdown and name like: capv-workload-node-nsg
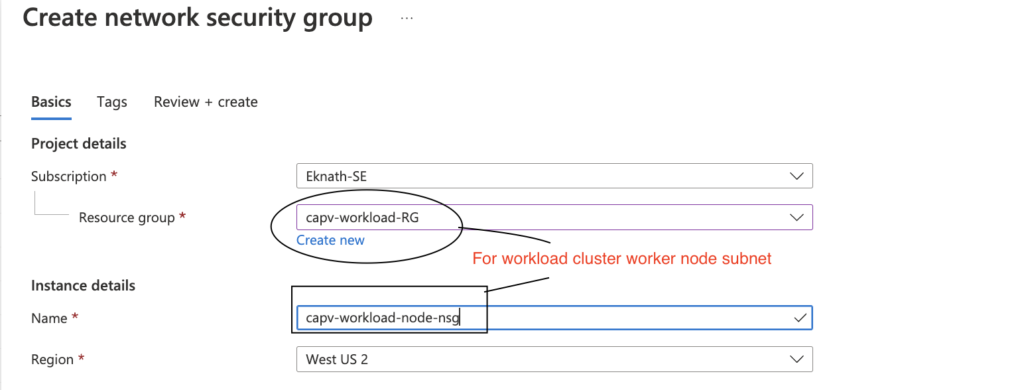
- Review + Create > Create
- In Azure portal, Navigate to Virtual Networks > workload vnet (capv-workload-vnet) > Subnets > workload cluster worker node subnet ( capv-workload-worker-A ) > Network security group > capv-workload-node-nsg > Save
Before starting with the deployment, it is important to ensure that the necessary pathways are open to all pieces of the clusters and that they are able to talk to one another.
Control Plane VMs/Subnet – HTTPS Inbound/Outbound to Internet and SSH and Secure Kubectl (22, 443, and 6443) Inbound/Outbound within the VNet
Worker Node VMs/Subnet – Secure Kubectl (6443) Inbound/Outbound within the VNet

Deploy a boot strap machine and Install Docker, Carvel tools, Tanzu CLI and kubectl using script
- Login to Azure portal > virtual machines > Create > Azure virtual machine > fill in the values as shown below:
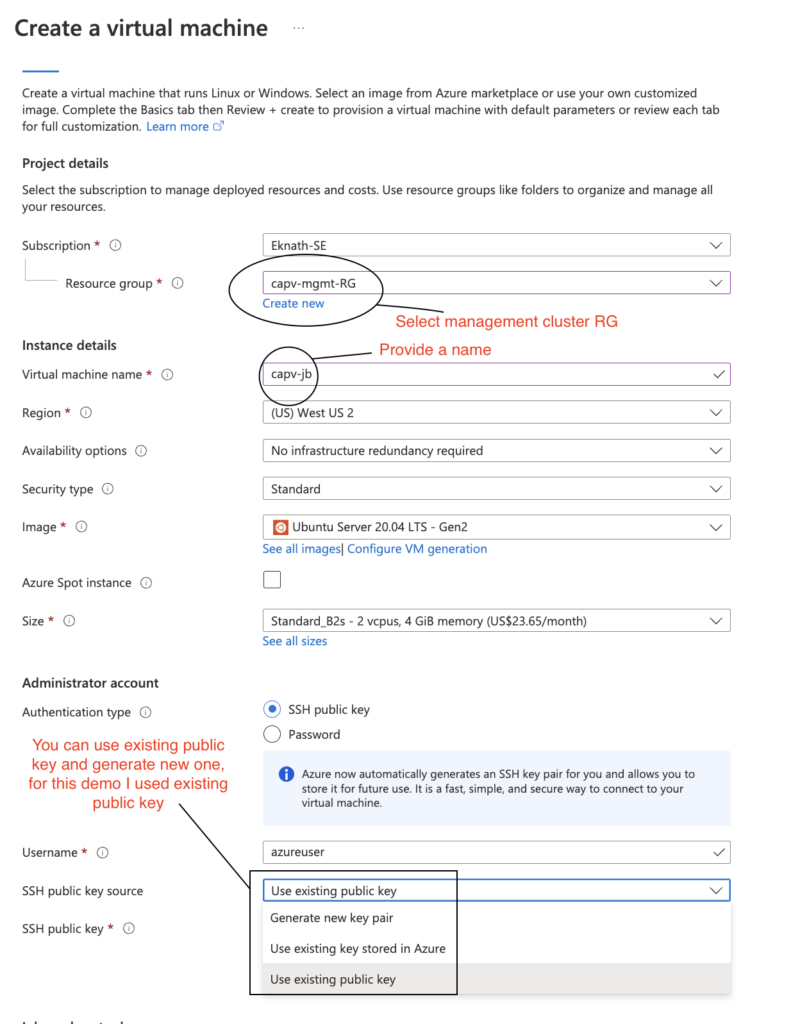
- Review + Create > Create
- Once the bootstrap vm is deployed successfully, download tanzu cli (VMware Tanzu CLI for Linux) and kubectl (Kubectl cluster cli v1.22.5 for Linux) from vmware connect
- Copy the downloaded files into bootstrap vm home directory (/home/azureuser)
- Connect to vm and create a file on home directory (/home/azureuser) of bootstrap jumpbox with name as prepare-setup.sh
Create service principal in Azure
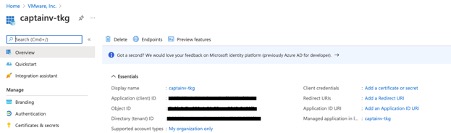
- Login to Azure portal > Azure Active Directory > App registrations > New registration – Give a Name

- Click on newly cleared application (service principal) and copy below req info in notepad, this will be used while creating management cluster:
- Application (client) ID
- Subscription ID
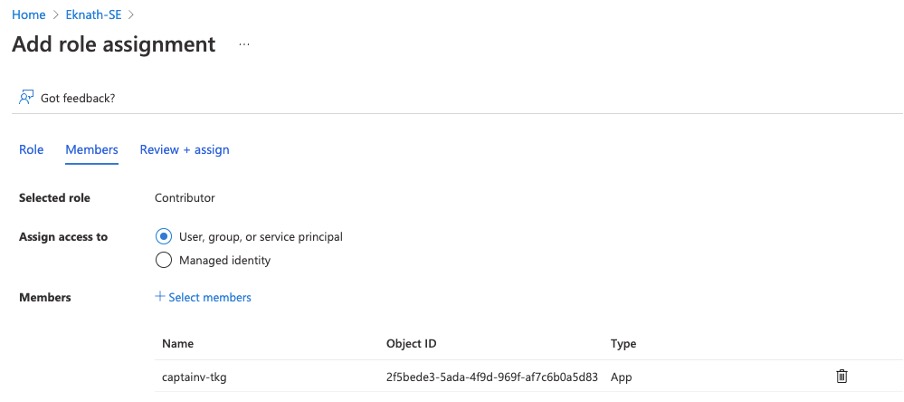
- Navigate to Subscriptions > IAM > Add role assignment > Contributor > Next > + Select members > search for application created earlier > Select > Next > Review + assign
- Navigate to Azure Active Directory > App registrations > click on application created earlier > Certificates & secrets > + New client secret > give a description > Add
- Copy the value and save in notepad, this the CLIENT_SECRET

Download and Install Azure CLI in boot strap machine:
Click here to find the steps to install azure cli in boot strap machine.
Accept the Base Image License:
Create new key pair:
To connect to Azure TKG vm’s (management cluster or workload vm’s), the bootstrap machine must provide the public key part of an SSH key pair. If your bootstrap machine does not already have an SSH key pair, you can use a tool such as ssh-keygen to generate one.
Create Management cluster
Create Management cluster using config file
- Create a config file in bootstrap machine ( name as mgmt-clusterconfig.yaml ) with below content by providing or replacing the values wherever required.
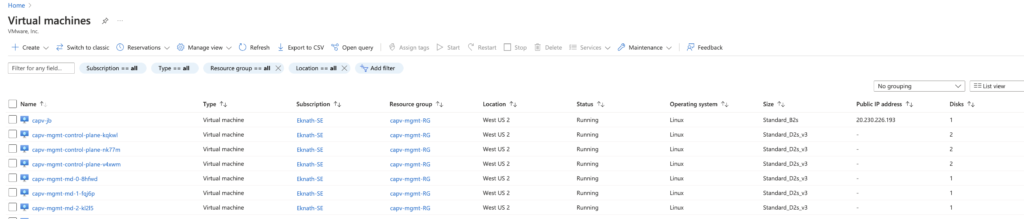
- Once management cluster is created successfully
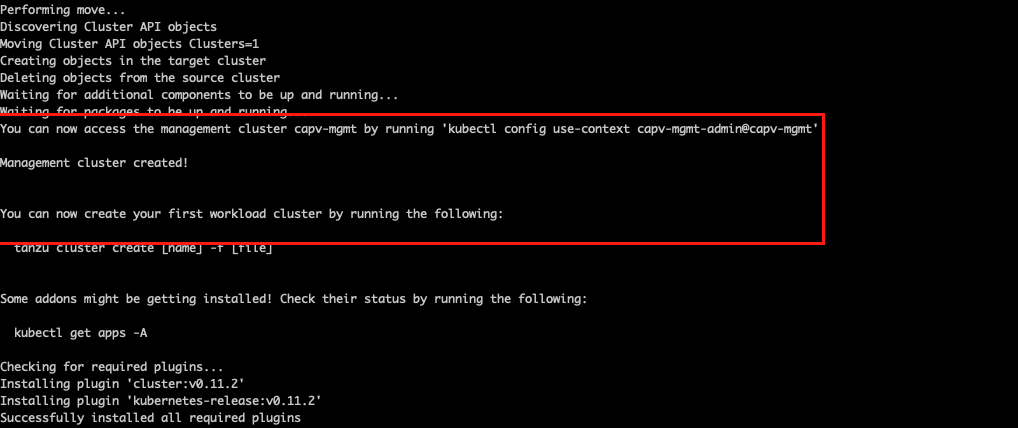
- VM deployed in Azure portal with no public IP.
Create Network Links
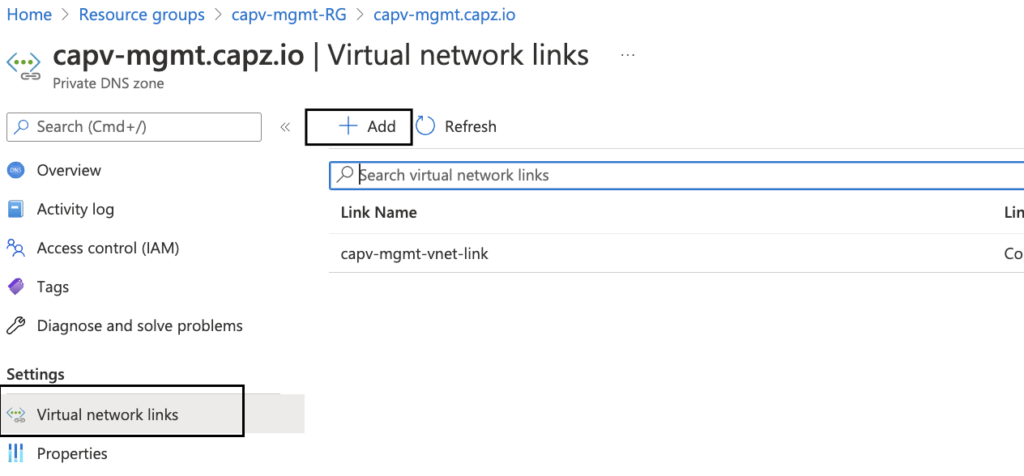
In Azure portal, Navigate to Resource groups > Management cluster RG (capv-mgmt-RG) > Overview > Resources > Private DNS zone (capv-mgmt.capz.io) > Virtual network links > Add
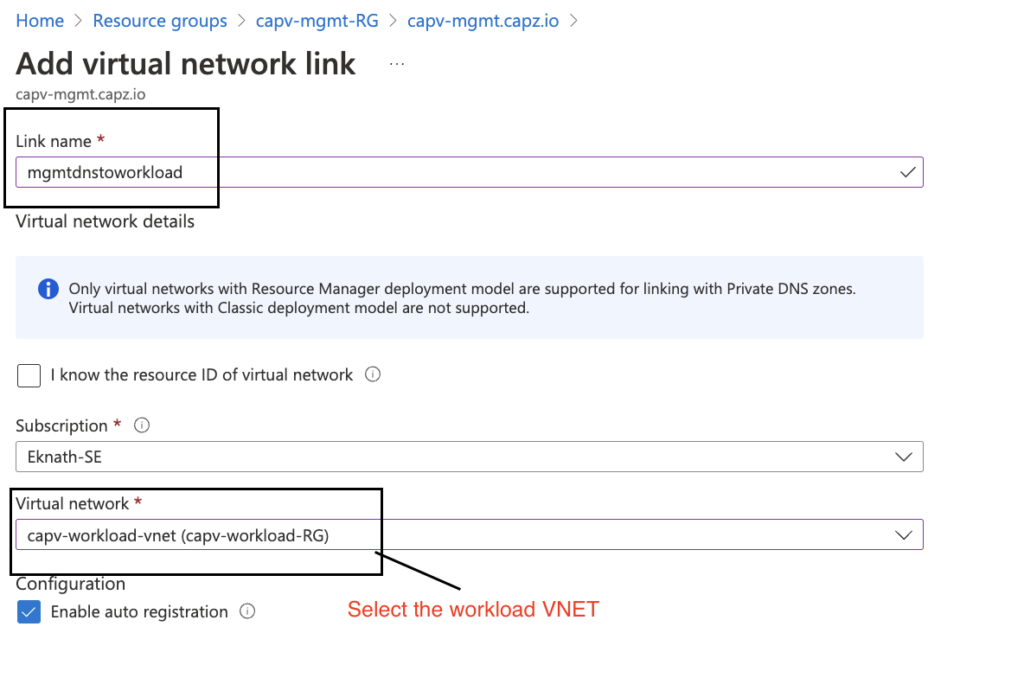
- Provide a Link name, In this case I have named it as mgmtdnstoworkload
- Virtual network: Select workload vnet (capv-workload-vnet)
Create Workload cluster
Create workload cluster using config file
- Create a config file with name as wc-config.yaml in bootstrap machine with below content by providing or replacing the values wherever required.
- Once below command is executed and cluster creation starts, keep and eye on resource group ( capv-workload-RG ) for resource – private DNS zone (capv-workload.capz.io). Once it is created, then create network links as shown below. This is required only once during first workload cluster deployment.
Create Network Links for workload cluster
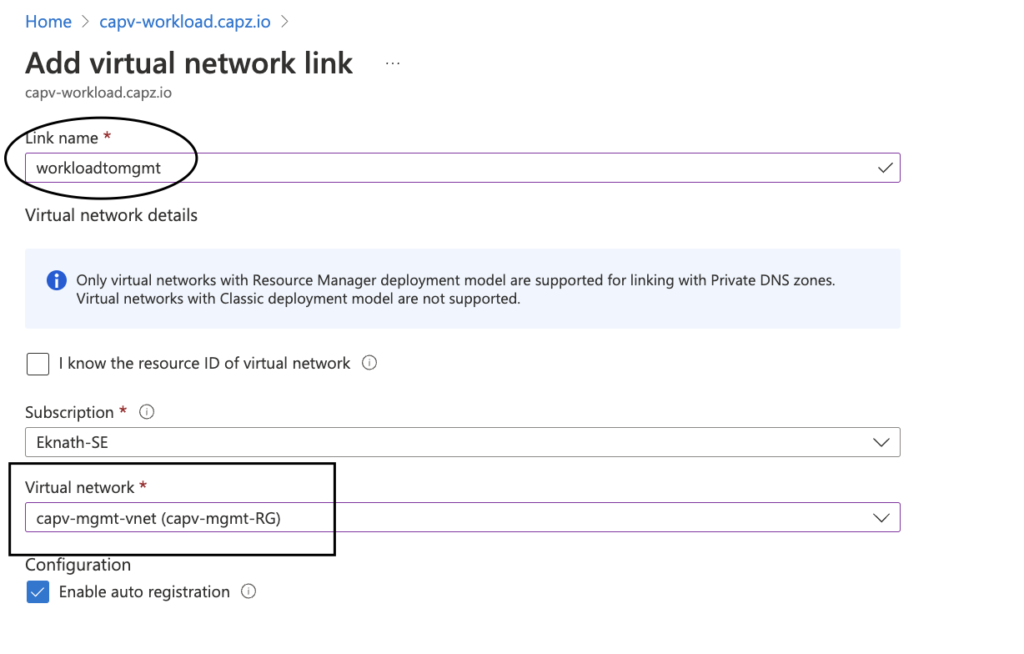
In Azure portal, Navigate to Resource groups > Workload cluster RG (capv-workload-RG) > Overview > Resources > Private DNS zone (capv-workload.capz.io) > Virtual network links > Add
- Provide a Link name, In this case I have named it as workloadtomgmt
- Virtual network: Select management vnet (capv-mgmt-vnet)

Validate
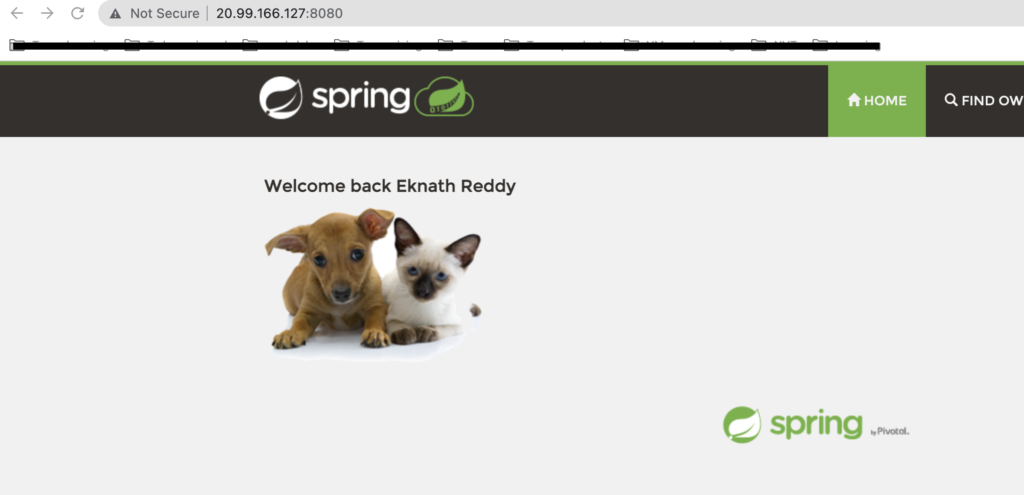
Deploy an application with external load balancer
- Access the load balancer IP in web browser:
Deploy an application with Internal load balancer
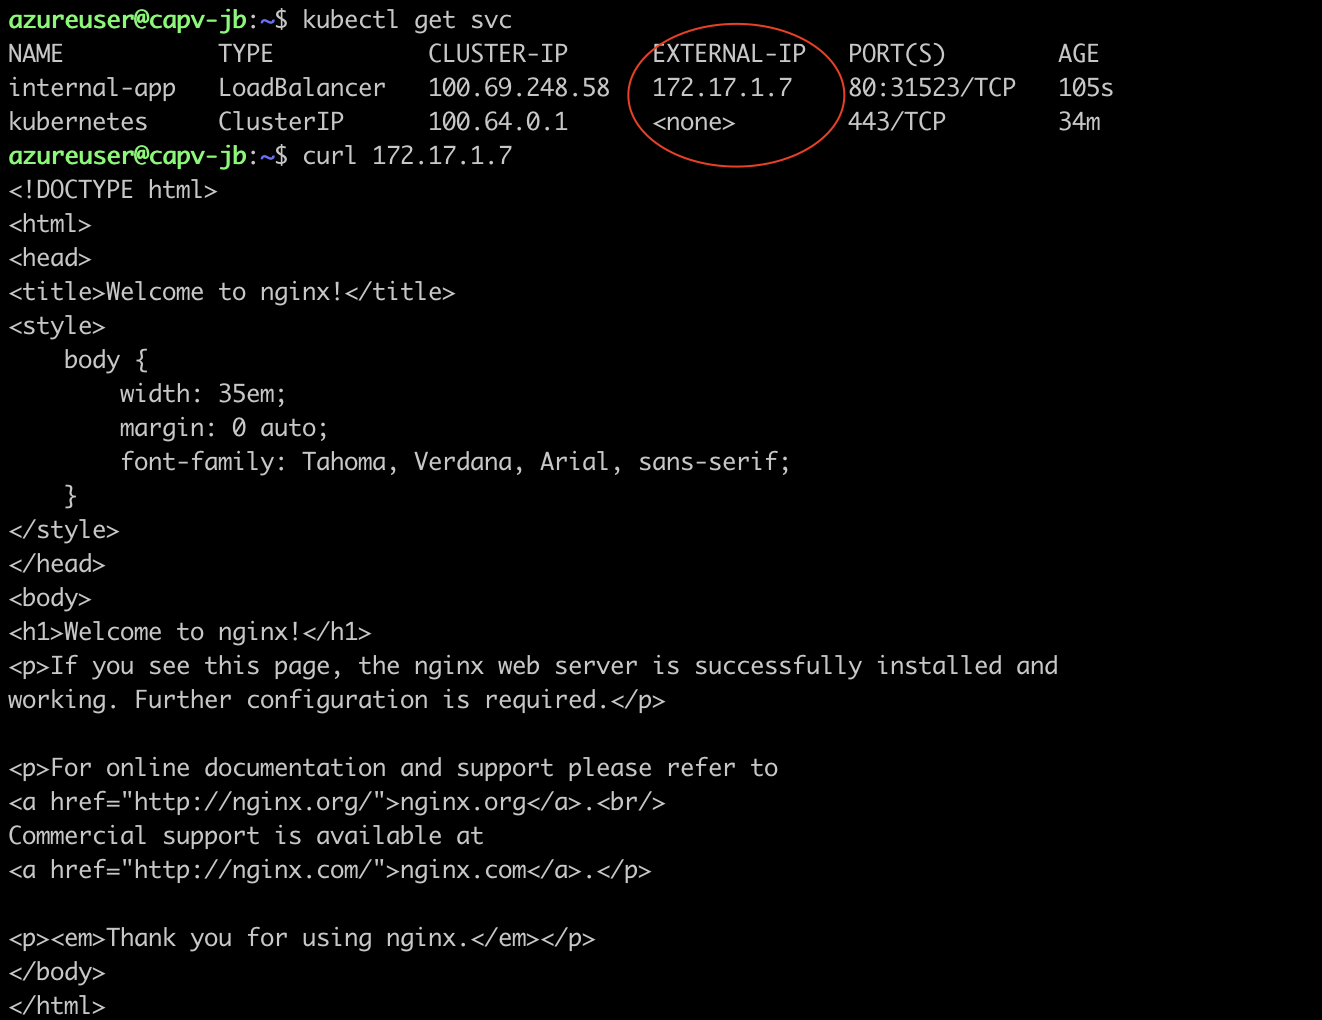
- To verify the created Internal and External load balancers: In Azure portal > Navigate to Load balancers > capv-workload-internal-lb > Frontend IP configuration:

Thanks for reading..