Install multus-cni using TMC Catalog

Reading Time: 3 mins

Overview:

Multus CNI is a container network interface (CNI) plugin for K8s that enables attaching multiple network interfaces to pods. Normally, when you deploy a pod, it will have single interface. so using Multus, you will be able to attach multiple interfaces to pod. This post explains how to install the Multus package onto a Tanzu Kubernetes (workload) cluster and use it to create pods with multiple network interfaces.

For example, Antrea or Calico as the primary CNI, and a secondary interface such as macvlan.

Pre reqs:

  •  Bootstrap machine with the following installed: Tanzu CLI, kubectl installed as mentioned here
  •  Tanzu Kubernetes Grid management cluster and workload cluster running on vSphere, Amazon EC2, or Azure, with the package repository installed. For this demo, I have deployed TKG on Azure.

Install:

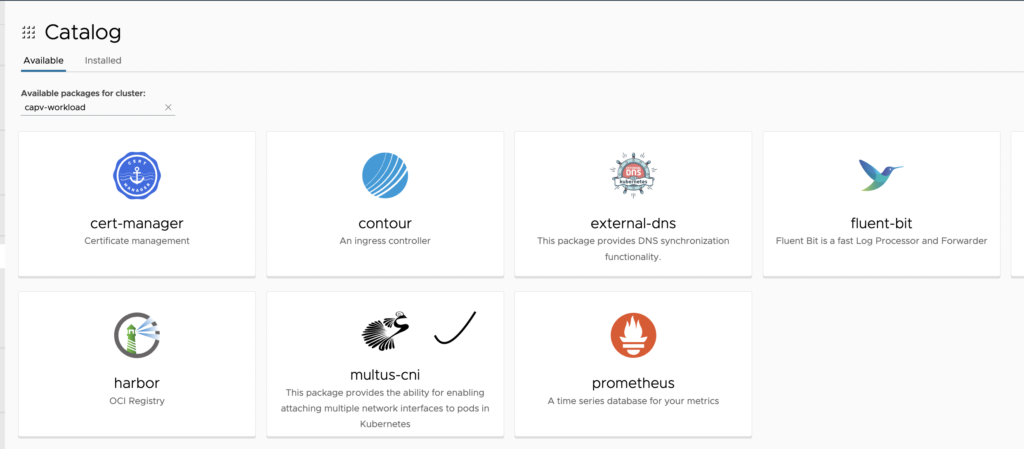
In TMC Console: Catalog > select the workload cluster (capv-workload in my case)  from drop down and click on multus-cni

  • Click on Install Package which can be found on top right side of the page

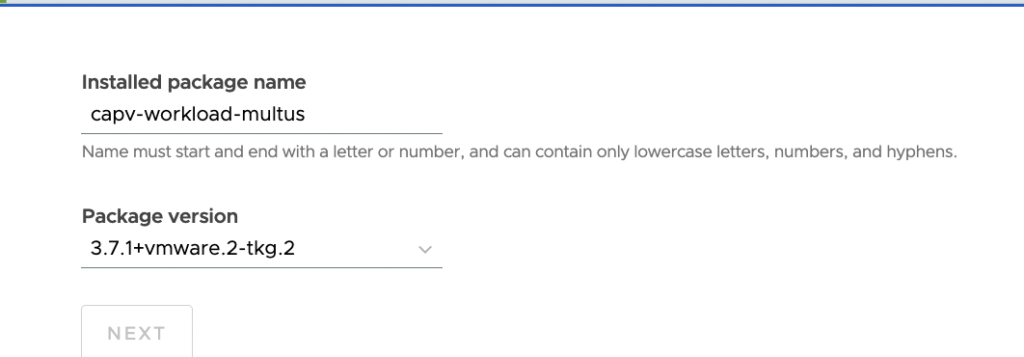
  • Name the Installed package as : capv-workload-multus and click NEXT

  • Package install resources: Leave to Default and click NEXT
  • Configure values: Leave to Default
  • Install Package

In TMC Console: Clusters > capv-workload > Add-ons > Installed > check if the package (multus-cni.tanzu.vmware.com) is succeeded and healthy

Daemonset
# Check the Daemonset and it should be running

kubectl get daemonset -n kube-system
NAME                   DESIRED   CURRENT   READY   UP-TO-DATE   AVAILABLE   NODE SELECTOR              AGE
antrea-agent           2         2         2       2            2           kubernetes.io/os=linux     2d23h
kube-multus-ds-amd64   2         2         2       2            2           kubernetes.io/arch=amd64   114s
kube-proxy             2         2         2       2            2           kubernetes.io/os=linux     2d23h
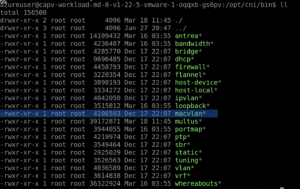
  • connect to workload cluster node(s) and check for the file macvlan under directory /opt/cni/bin

  • Create a CRD specification. For example, create a file with name as multus-cni-crd.yaml that specifies a NetworkAttachmentDefinition named macvlan-conf, which configures a macvlan CNI:
multus-cni-crd.yaml
apiVersion: "k8s.cni.cncf.io/v1"
kind: NetworkAttachmentDefinition
metadata:
  name: macvlan-conf
spec:
  config: '{
      "cniVersion": "0.3.0",
      "type": "macvlan",
      "master": "eth0",
      "mode": "bridge",
      "ipam": {
        "type": "host-local",
        "subnet": "192.168.1.0/24",
        "rangeStart": "192.168.1.200",
        "rangeEnd": "192.168.1.216",
        "routes": [
          { "dst": "0.0.0.0/0" }
        ],
        "gateway": "192.168.1.1"
      }
    }'
Create CRD
# Get the admin credentials of the workload cluster into which you want to deploy Multus cni. In this case, capv-workload is workload cluster: 

$ tanzu cluster kubeconfig get capv-workload --admin

# Set the context of kubectl to the cluster

$ kubectl config use-context capv-workload-admin@capv-workload

# Create crd
kubectl create -f multus-cni-crd.yaml

Validate

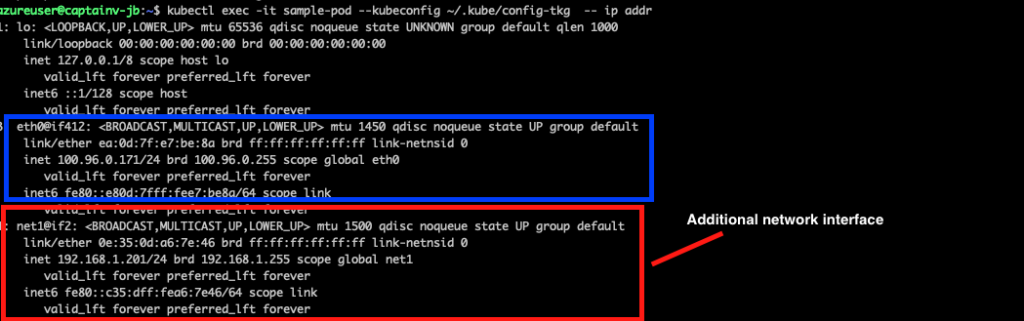
  • Create test pod with config as below:
apiVersion: v1
kind: Pod
metadata:
  name: sample-pod
  annotations:
    k8s.v1.cni.cncf.io/networks: macvlan-conf
spec:
  containers:
  - name: sample-pod
    command: ["tail"]
    args: ["-f", "/dev/null"]
    image: eknath009/netshoot
connect to pod
# Create pod

kubectl create -f my-multi-cni-pod.yaml

# Connect to pod

kubectl exec -it sample-pod  -- ip addr
  • Once the pod is created, it will have three network interfaces (including loop back interface) as shown below. net1 is the new interface created via multus-cni.